Table of Contents
Prerequisites
We assume that you are somewhat familiar with:
- git and gitlab (https://eicweb.phy.anl.gov)
- working in the terminal over ssh and can copy files to your local machine.
- cmake, C++, python, and shell scripting
This tutorial requires that singularity is installed on the local system. Singularity can be downloaded here -- 3.7 being the most recent version as of January 2021.
- The tutorial has been tested on both the BNL and JLAB interactive nodes.
- For an optimal experience, we strongly recommend you to use singularity 3 or later for this tutorial. Use (very) old versions of singularity (e.g. 2.6.x) at your own risk!
Step 1: Setup the EIC Software Container (jug_xl)
Step 1a: Create a local directory that you want to work in, e.g., ~/eic
Step 1b: Deploy the containerized environment and launch a shell
Execute the following line in your terminal to setup your environment in your sandbox
directory. This will install the latest stable container and place a script called
eic-shell in the top-level directory. This script will load the environment for you.
Now you can launch a shell in our development environment:
Note that starting eic-shell will set the environment variable ATHENA_PREFIX to point
to the local subdirectory of your chosen working directory (e.g.,~/eic/local.
This will then automatically add $ATHENA_PREFIX/lib to your LD_LIBRARY_PATH in the
container. This means that anything you install to the ATHENA_PREFIX will be
automatically available in your environment. This is important for DD4hep to find your
custom installed detector plugins.
Step 2: Clone the repos
There are 2 repos you need:
- IP6 (IP-specific components)
- Athena detector
In part 1 of the tutorial we will be mostly using files from a tutorial repo. Later on, we will com back to these detector repositories.
Step 3: Looking at the geometry
Before moving on to part 1, let's generate the geometry in a ROOT file:
Note: if you want to skip this, you can click here to view the latest detector from the athena repository.
For this example we will generate a geometry ROOT file (called detector_geometry.root),
copy this file to your local computer and open it with our web viewer.
To generate the geometry file, please execute the following commands:
(Note: the source /opt/detector/setup.sh command adds the Athena detector plugins that ship
with the jug_xl container to your environment.)
Please copy this file to your local computer (using scp) if working on a remote system.
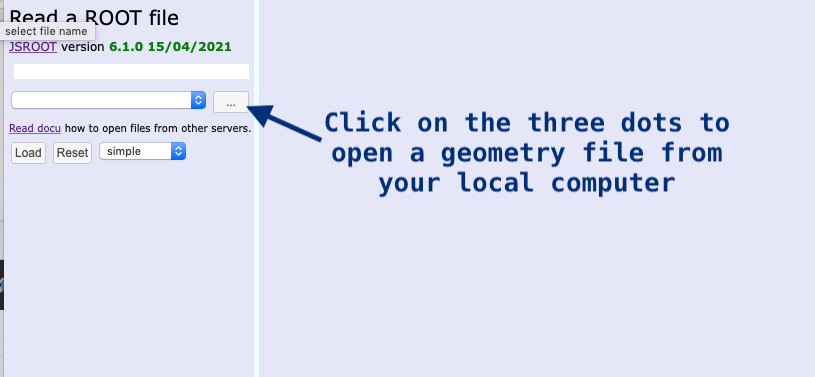
Then open the web viewer, and click on the ... and
open the local ROOT file from your hard drive.

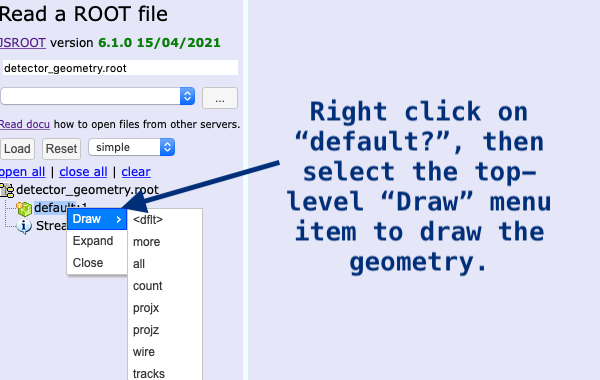
This will populate the sidebar with the objects in the ROOT file. Right click on "default" and then click on "Draw" in the top-level menu (you don't have to select any specific draw-options in the draw submenu, you only need to click on "Draw" itself).

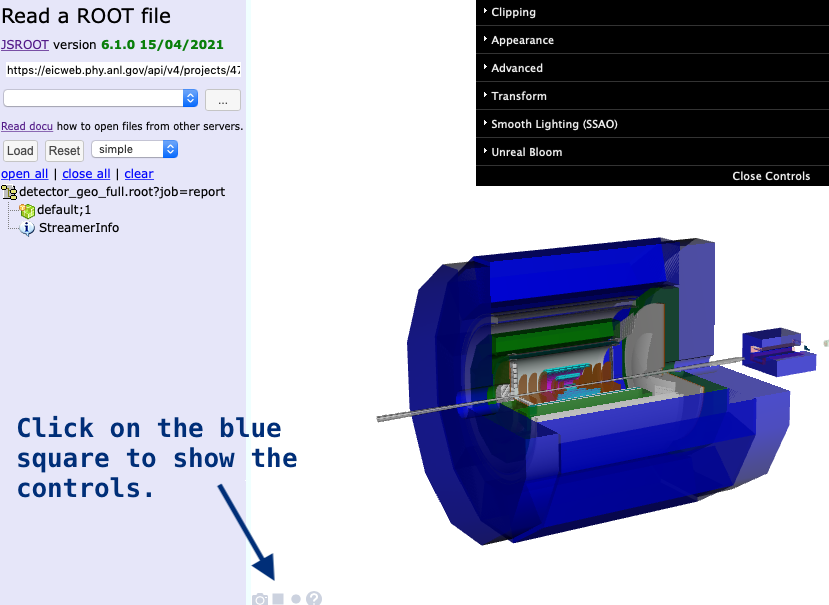
Now you will see the detector geometry in the main viewer window. In order to modify the view you can:
- Right-click and drag to move the view around (or two-finger drag on a mobile device).
- Left-click and drag to rotate the view (or one-finger drag on a mobile device).
- Use your mouse wheel to zoom in and out (or pinch on a mobile device).
- Click on the blue square on in the bottom left of the canvas to open the controls. Here you can change settings such as cut-outs (clipping, try selecting all of 'X', 'Y', and 'Z'), and transparency (under "appearance").
- Right-click on the canvas to show other options.

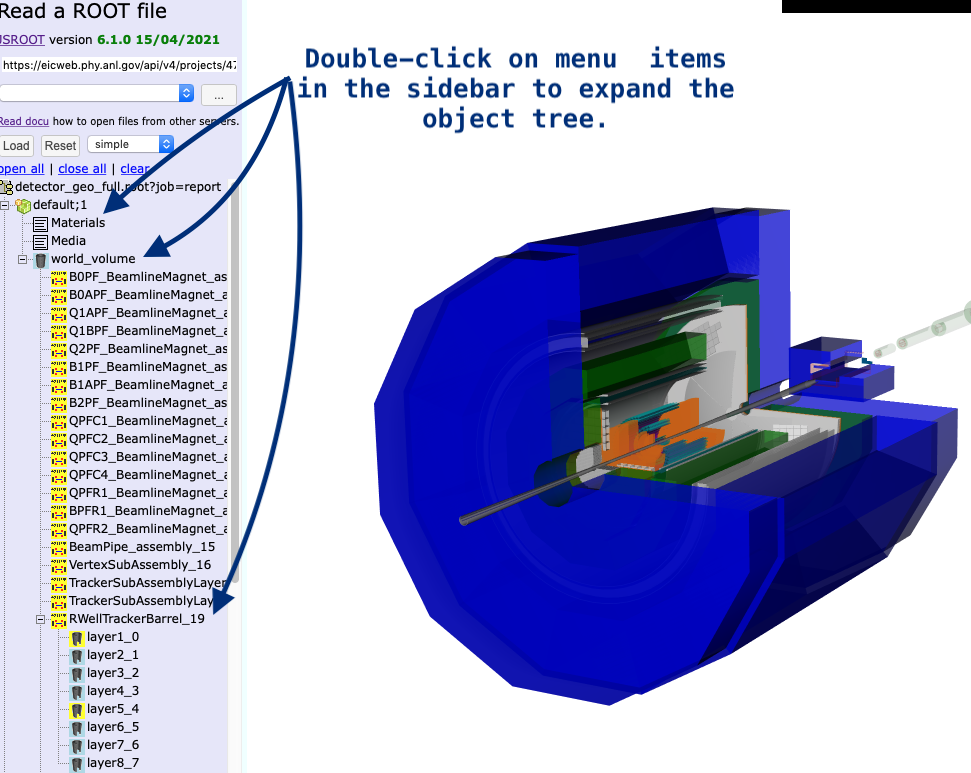
Finally, you can browse and display the subgeometries in the file. Double-click on "default" and then "world_volume" to expand the list of objects. You can also expand each of the sub-geometries in their components. To display one of the sub-geometries, right-click on the component you want to view and select "Draw".

That's all. You should now be ready to continue with Part 1 of the tutorial.
Edit this page on eicweb